Change to the camera view Numpad-0
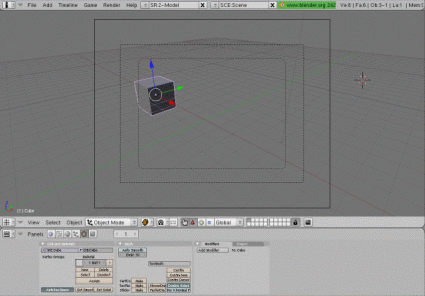
1. Move object to the Start position
Move the cube to the approximate postion shown along the X-axis
RMB the cube, Gkey, Xkey, drag the mouse to position the cube, LMB
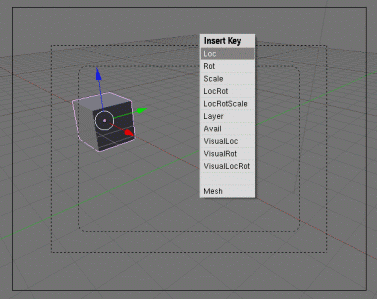
2. Set the first Key Frame.
When ever you wish to change the Location, Rotation or Scale of an object you must set the starting key frame and the ending keyframe, Blender will fill in the frames in-between.
We are going to change the location of the cube first.
I-key to activate the Insert menu menu, LMB on LOC from the popup menu
(Note: your mouse pointer MUST be somewhere on the canvas area)
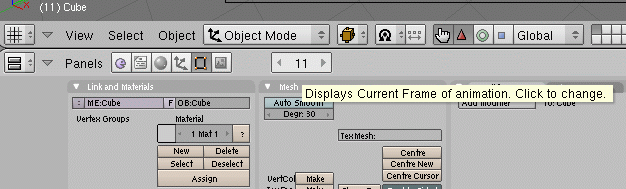
3. Add frames
Click on the left arrow beside the frame counter until it reaches 11
OR
press the Up-arrow to add 10 frames
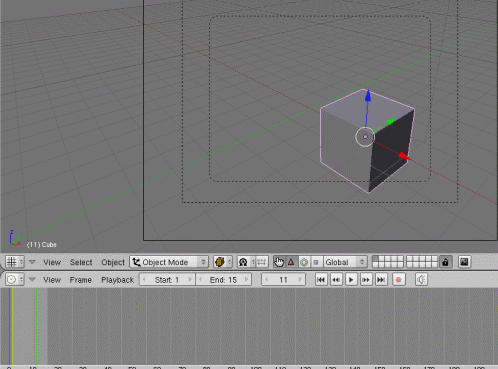
4. Move object to the next position
RMB the cube to select it (if it is not already selected), Gkey, Xkey, drag the mouse to position the cube, LMB

5. Set the next Key Frame.
I-key to activate the Insert menu menu, LMB on LOC from the popup menu
(Note: your mouse pointer MUST be somewhere on the canvas area)

6. Playing your animation.
Switch the window panel to the Timeline view

7. Timeline view
You now have play, rewind, fastforward, .. buttons.
You may wish to change the END setting from 250 to about 15 before you play.
When you click play your animation should move across the screen.
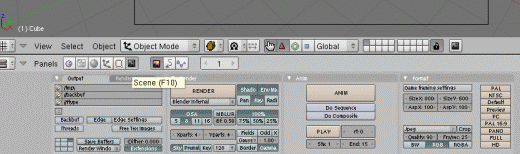
8a. Exporting your animation, this lets you play it without Blender
Switch back from the Timeline view to the Buttons Window view
Select the Scene button in the panel or press F10
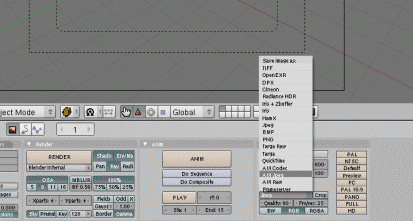
8b. Set the output format.
Blender has a large number of animation output formats, the default is JPEG images (a 15 frame animation will have 15 seperate Jpeg images)
We will use AVI Jpeg.
Change the File format to AVI Jpeg
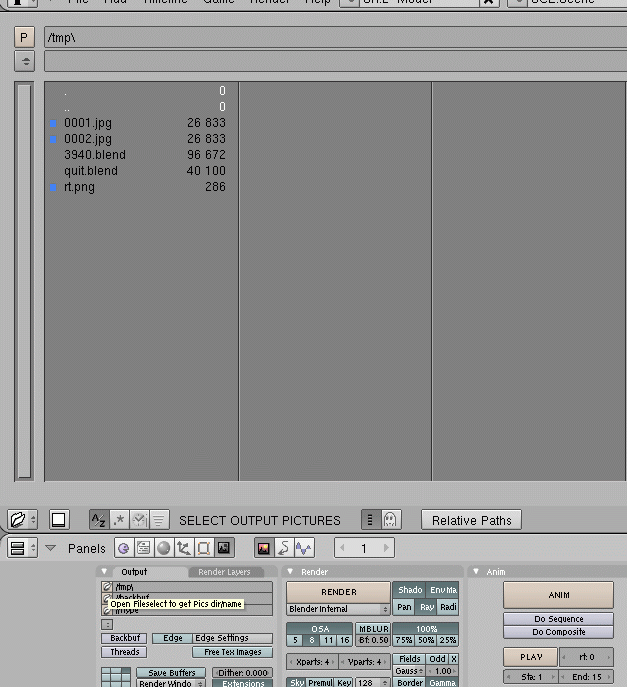
8c. Select the output directory and filename.
Choose the directory and enter the filename you wish to use for the animation.
Be sure to click the "select output pictures" button whne done.
8d. Rendering the Animation.
Check the Start (STA) and the end (END) frames are correct.
Click the ANIM button.
Note: Longer complex aniamtion can take a long time.
9. View your animation.
You no longer need Blender to view your finished product.
Goto the directory where you saved your animation and open it.
Note: In the sample rotation is added.